*August Tech Talk by Sherry London. Sherry London’s in-depth posts for The Textile Design Lab show our members how to improve their design process by using technology to its fullest capacity. This is an excerpt of a longer post available only to members of The Textile Design Lab. Join us to access the full post!
One of the frequent requests I’ve gotten as a result of my blog posts is to talk about the Image trace command in Illustrator (called Live Trace in pre-CS6 versions). My Jan 2014 and Feb 2014 blog posts on drawing for scanning and fixing scans in Photoshop should give you a clear idea of what a “good, cleaned scan” for Illustrator tracing looks like.
Now, you are ready to turn it into vectors. Let’s look at the “no frills” method (in the full post available in The Textile Design Lab I will show you some ways to improve that result.)
The basic steps are very easy:
1. Open your raster image in Illustrator using the File > Open command.
2. Select the raster with the Selection tool.
3. Click Image Trace (or Live Trace) on the Control Panel to trace the image.

4. Click Expand. (In Live Trace, you can click Expand or Live Paint—for this example, just click Expand.)
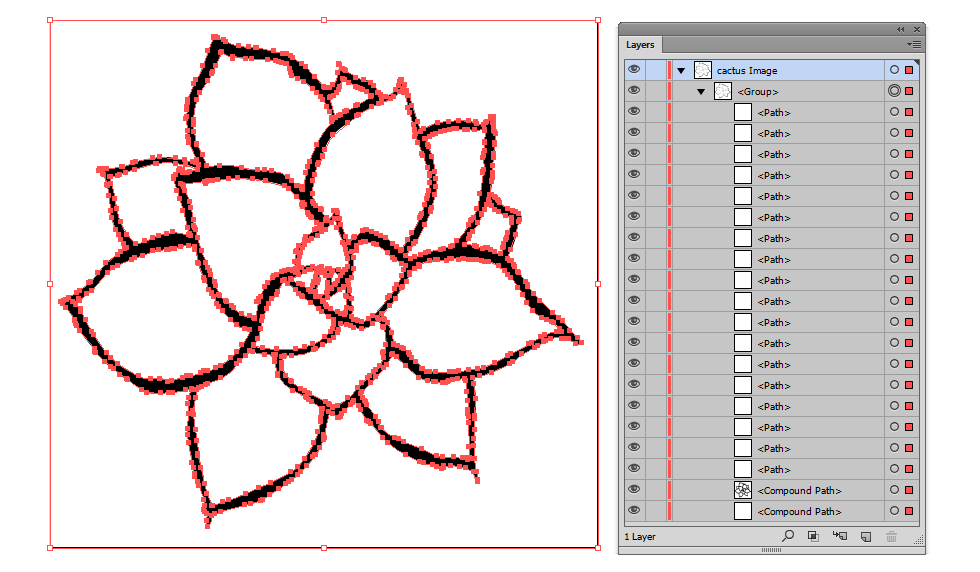
This is the resulting image. You can see a huge number of anchor points and what looks like a lot of white paths in the Layers panel (as well as two compound paths)
The compound path that is one up from the bottom is the cactus plant outline with all the leaves cut out. The larger compound path is the white background of the image. The other white path layers are the leaves of the plant.
This trace leaves you with a white area inside each leaf, a single connected outline around the entire cactus that includes the shape of the individual leaves, and an outside shape. It isn’t a bad or unacceptable result, but it can be improved. Let’s look at the Image Trace dialog box and see what you can change.
The Dialog Box
Adobe made a huge change in the dialog box and in the way the command works between CS5 and CS6. I am not totally convinced that the results are better, but the changes make it harder to move from version to version.
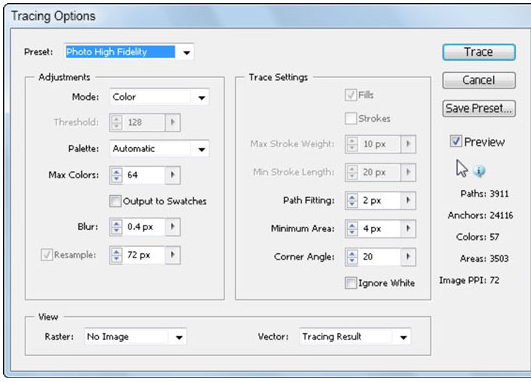
CS5 Tracing Options
CS4 and 5 had many fewer options in Live Trace, and these options were divided into a few controls on the Control panel and all them repeated in the Live Trace Options dialog box. The Min area in CS5 has been replaced with the Threshold slider in CS6 and above. Since I no longer have a working copy of CS5 installed, I’ll use the CC2014 screen shots for the rest of this.
Here’s the CC2014 version of Tracing Options:
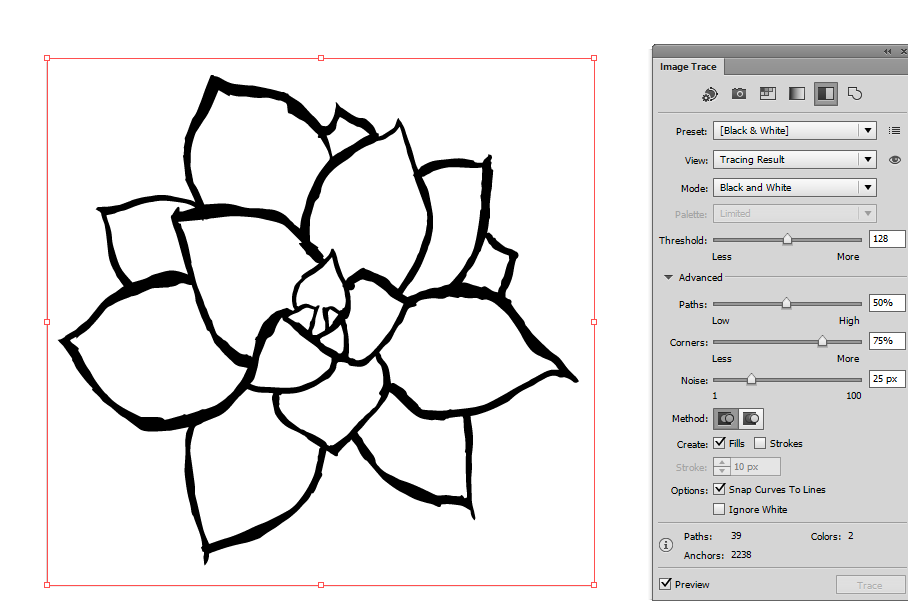
Let’s look at the changes that these control can make.
Presets
Presets are shortcuts that change some of the sliders and settings in the dialog box for you and save you the work of doing it yourself. You can use them as a starting point and still make changes or you can use them as is. You can also save your own settings as a preset if you find that you have a consistent group of settings that you like.

Noise
Can you draw smooth lines, or does your hand wobble a bit a bit when you draw? Have you got some stray pixels you forgot to clean up in Photoshop?
The Threshold setting in the main dialog box and the Noise setting in the Advanced controls can alter the default settings to get you the tracing you want. The Threshold setting determines how dark a line must be before it’s considered to be black (and traceable).
The Shape of Shapes
In Fills mode, Image Trace creates filled shapes—not stroked paths. Shapes are closed paths composed of multiple anchor points. These anchor points can be either corner points or curve points. Curve points make the line curve (!) and corner points give the lines sharp corners and straight edges.
Left to its defaults, Illustrator prefers to create more corners than curves and to snap curves where possible into straight lines. That’s great if you’re trying to trace rectangles but not as helpful if you have mostly curves.
So, Illustrator has settings in the Image Trace dialog box that help to guide it to make the type of shapes you prefer. A curve is not better than a corner; the issue is what you want to see.
Join us in The Textile Design Lab to access the full version of this post and learn how to put yourself into the driver’s seat with the various Image Trace settings. In the extended post Sherry goes into further depth about Presets, Noise, Paths and Corners, and the Method and Ignore White controls. Enjoy!