*September Tech Talk by Sherry London. Each month Sherry brings The Textile Design Lab an in-depth post on how to improve our design process by using technology to its fullest capacity. This is an excerpt of a longer post available to members of The Textile Design Lab. Join us to access the full post!*
“Why do two colors, put one next to the other, sing?” ― Pablo Picasso
Colors sing when we get it right; when the design flows and the process speaks to us. But what do you do with a set of connected black paths sitting there alone on an Illustrator screen? They are just begging for color. So, how do you add it?
The answer depends, in part, in how you vectorized your drawing. You could have:
- Used the Pen tool to create individual paths of each object.
- Used Image Trace/Live Trace and left the white in the image.
- Used Image Trace/Live Trace and removed the white areas from being traced.
The Pen tool, of course, is the most accurate way to convert your sketch into vector form. When you use the Pen tool, you create exactly what you need, and only what you need. Every shape can be separated from the other, thus giving you the most flexible editing environment possible. It’s perfect in every way—almost…
If you lack time (as most of us do) or patience (probably my most glaring fault), the Pen tool can be agonizingly slow and painstaking. True, the more one uses it, the faster the process becomes.
The other issue with the Pen tool is that it is perfect; the lines it creates are perfect—and clearly digital and non-human. One of the main advantages of not using the Pen tool for vectorizing sketches is that you can retain the hand-drawn character of your lines if you use a trace command.
Using Image Trace/Live Trace
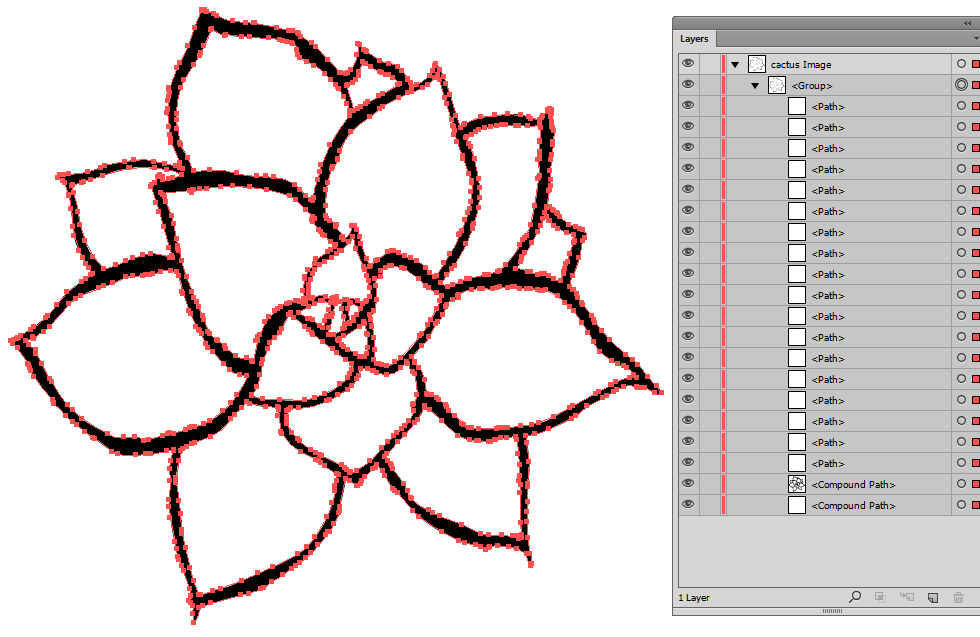
Below, you can see the cactus we traced in the August 2014 blog.
You can see from the Layers panel that the entire black outline is connected. It’s not a stroke; it’s a fill and it’s a compound path. I could move each of the white leaves, but only the partial leaves and moving them would leave gaps. The black outline needs to move as one piece.
So how would one add color to this image?
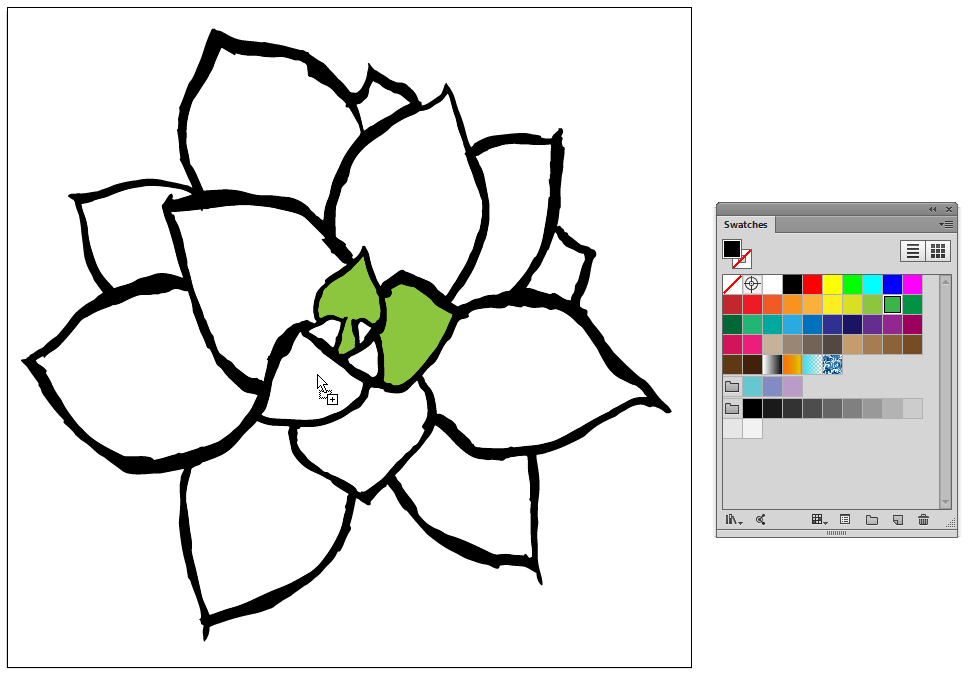
Actually, it’s easy so long as you don’t want to move anything, With nothing selected, all I need to do is drag a color from the Swatches panel and drop it into the area I want to color (with the Fill swatch active in the Tools panel, of course.)
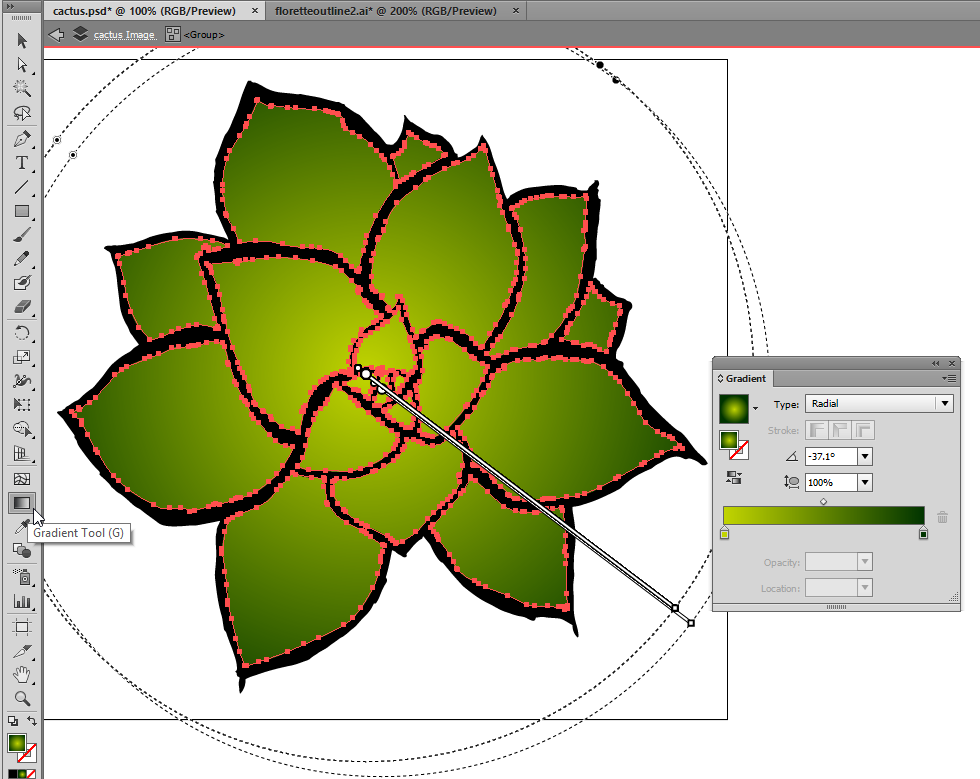
I could even if I wished to, select all of the white leaves and add a gradient to all of them at once. In the image below, I created a custom gradient, made it radial and used the Gradient tool to make it appear as if the color radiated from the center of the cactus to the edges. Once the gradient is adjusted to cover all the leaves, each leaf gets its own piece of the gradient and you can still alter the colors on one of the leaves without affecting the others (if, for example, I decided to make 3 leaves hot pink).
If any of you wonder how I selected just the leaves, I put the object into Isolation mode and SHIFT+clicked each leaf path’s selection icon (the meatball) on the Layers panel to select just the leaves.
Once the leaves are colored, you could either leave the black outline or delete that compound path completely—depending on the look you want.
Join us in The Textile Design Lab to access the full version of this post and learn how to get color into a Live Trace that contains no white, how to use the Divide pathfinder command, and Sherry’s in-depth explanation of the magic of the Live Paint feature!

